Basic mouse and keyboard operations for using the software
Mouse
A mouse with at least two buttons is required; a third button or scroll wheel is highly recommended. Trackpads and touchpads should not be used.
Single-Click: Press and release the mouse button once. Unless otherwise indicated, you’ll single-click (“click” or “left-click”) with the left mouse button.
Double-Click: Rapidly click the left mouse button twice without moving the mouse. The time necessary to complete a double-click is determined by your Windows settings (typically, less than one second).
Drag: Move the mouse while pressing and holding the left mouse button.
Left Button:
- In 2D: Click the left mouse button to select tools and objects.
- In 3D: Click and hold the left button while moving the mouse to rotate the view.
Right Button:
- In 2D: Click the right mouse button to Undo or to access the right-click menu.
- In 3D: Click and hold the right button while moving the mouse to zoom.
Middle Button:
- Zoom in 2D: Scroll the middle mouse button up or down.
- Pan in 2D or 3D: Click and hold the middle mouse button while moving the mouse.
Keyboard
Many common functions can be performed quickly by using keys, or a combination of keys, on the keyboard. “Hotkeys,” which are assigned to Tools, Guides, Angle Snaps, and other options, will appear when you hover over each Tool and Guide in the software; you’ll also see them displayed next to each Angle Snap option.
The following keys on the keyboard can also be used to perform a variety of functions:
CTRL: In 2D and 3D, you can select/deselect items by holding down the CTRL key and left-clicking on each item. In the Terrain Stage, you can activate the 3D Terrain Tools with the CTRL key.
ALT: In 2D, you can set a pivot point for an object to orient around by holding down the ALT key while left-clicking with the Rotate Tool activated.
Shift: Activate World Angle in 2D by holding down the Shift key while drawing. Activate the marquee tool in 2D and 3D by holding down shift while dragging the mouse. Duplicate objects by shift-dragging the 3D Gizmo.
Space Bar: Press to enable/disable auto-rotation in the 3D viewport and in Presentation Mode.
Delete: Press to delete the currently selected object.
Enter: Press to auto-complete a drawing.
Esc:
- In 2D: Press the Esc key to stop drawing your current shape without completing it (this function can also be performed by left-clicking the last point drawn) or to clear the mouse cursor of a library item when using Insert to place multiple library items.
- In 3D: Press the Esc key to move to 2D.
- In Presentation Mode: Press the Esc key to bring up the Presentation Menu.
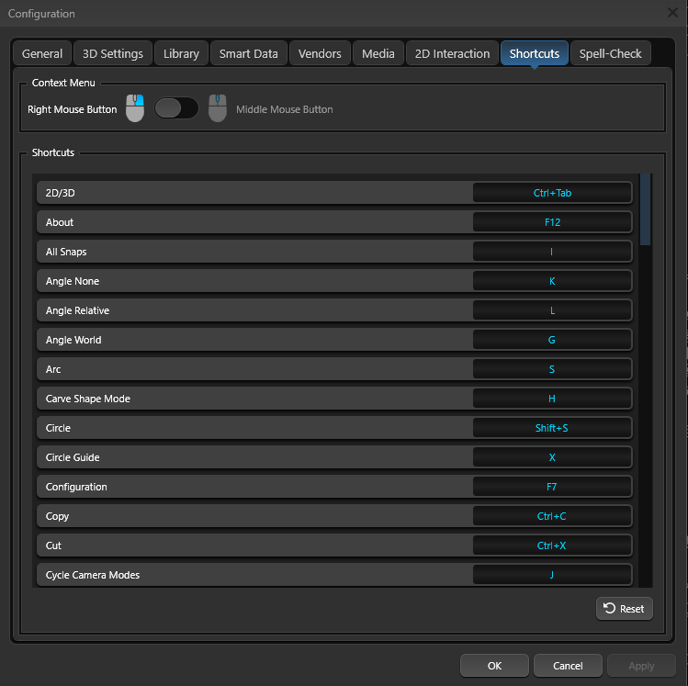
Keyboard Shortcuts
The Configuration menu (Keyboard Shortcut: F7) offers you the flexibility of modifying many keyboard shortcuts, which you’ll find listed under the Shortcuts tab.
CTRL Commands
The following commands and shortcuts use the CTRL key, or the Control key, on the bottom of the keyboard. Simply press and hold CTRL on your keyboard, then press the associated letter or number. (Please note: Some of these commands only work in 2D.)
For example, to save your current design, press and hold the CTRL key on the keyboard, press the “S” key once, then release the CTRL key.
CTRL + S: Save your current design. The first time this is pressed in a new design, you will be prompted to select or create the file name.
CTRL + O: Open an existing design. By default, this will open the Save folder or the last folder that a .SAV file was opened or saved in. If you have not saved your work in the current design, you will be prompted to do so before the new design opens.
CTRL + N: Begin a new design. If you have not saved your work in the current design, you will be prompted to do so before the new design opens.
CTRL + P: Print the current design. This will load the Print Preview screen.
CTRL + A: Select all shapes from the current stage. If “Select objects from any stage” is checked, then all objects in the design will be selected.
CTRL + D: Deselect objects.
CTRL + L: Open or close the Library.
CTRL + C: Copy the currently selected shape or object.
CTRL + X: Cut the currently selected shape or object. Cut is similar to Copy, but Cut will remove the selected shape, while Copy duplicates the shape without removing it.
CTRL + V: Paste the last shape/object that was cut or copied.
CTRL + Z: Undo the last action. For example, if you delete, move, or alter a shape, this function will undo that change. This can be used multiple times to go back several actions.
CTRL + Y: Redo the last action that was undone. Once undo is used, this will redo the undone action.
CTRL + G: Group several selected shapes/objects together in order to move or scale the objects as one object.
CTRL + U: Ungroup a group of shapes/objects. This is very helpful when first inserting items from the Library, as these shapes are often grouped by default.
CTRL + B: Hide or display a background image.
CTRL + Shift + B: Hide or display a GIS image.
CTRL + M: Hide or display measurements.
CTRL + H: Hide the selected object.
CTRL + Tab: Go to 3D View while in 2D, and vice versa.
CTRL + Left or Right Arrow Key: Rotate the sun/moon around the horizon.
CTRL + Up or Down Arrow Key: Raise and lower the position of the sun/moon.
Moving between Stages with the CTRL Key
You can also use the CTRL key to jump to different stages. For example, pressing CTRL + 7 will take you to Stage 7.
CTRL + Page Up: Go to the next stage.
CTRL + Page Down: Go to the previous stage.
Alt, Shift, and Combined Commands
The following commands use the Alt key or the Shift key, sometimes with the CTRL key.
Alt
Alt + Back: Undo. This second undo option is in addition to CTRL + Z.
Shift
Shift + A: Select the Rectangle Tool.
Shift + S: Select the Circle Tool.
Shift + L: Lock/Unlock Selected Shapes in Place.
Shift + N: Turn On/Off True Shadows.
Combined Commands
CTRL + Shift + B: Hide or display a GIS image.
CTRL + Shift + G: Show/Hide Grid.
CTRL + Shift + U: Union Shapes.
CTRL + Shift + C: Copy Fill Patterns.
CTRL + Shift + V: Paste Fill Patterns.
F Key Commands
The F keys, numbered 1 through 12, can be found at the top of your keyboard. Simply press the button to operate the shortcut (no need to press CTRL or ALT).
F5: View Presentation Mode. This will take you directly to the full-screen 3D Presentation mode, not to the Finalize phase.
F7: Open the Configuration Menu, where you can review software settings and change the 3D/Presentation display quality.
F10: Open the Project folder.
F12: Open the About the Software screen, which displays your CD Key, video card, and other hardware information.
Tool, Guide, and Angle Snap Commands
These commands let you select a new Tool or Guide or activate Angle Snaps so that you can continue drawing without going to the panel. Simply press the corresponding letter (no need to press CTRL or ALT).
Tools
Q: Select the Move Tool
W: Select the Rotate Tool
E: Select the Scale Tool
F: Select the Freehand Tool
A: Select the Line Tool
S: Select the Arc Tool
D: Select the Outline Tool
T: Select the Divide Tool
Shift + A: Select the Rectangle Tool
Shift + S: Select the Circle Tool
R: Select the Smooth Tool
H: Select the Carve Tool
O: Auto-Complete a Shape
Guides
X: Select the Circle Guide
Z: Select the Rectangle Guide
Snaps
I: Turn On/Off All Snaps
K: Set Angle Snap to None
L: Set Angle Snap to Relative Angle
G: Set Angle Snap to World Angle
3D View Commands
These are keyboard shortcuts and commands for the 3D View.
J: Walk mode. Same as Presentation Mode, allows you to walk along the ground. Press again to turn off.
, Press the comma key to move left while in Walk or Fly Mode.
. Press the period key to move right while in Walk or Fly Mode.
B: To quickly zoom in on a selected object, simply click the object in 3D and press the "B" key. You can then click the underlying hardscape to easily zoom back out. This provides a fast and efficient way to navigate the software and focus on specific details.
Space Bar: Automated tour. The view will automatically rotate around the project. Press again to turn off.
Left and Right Arrow Keys: Pan your view around the project.
Up and Down Arrow Keys: Zoom your view in or out.
CTRL + UP/DOWN/LEFT/RIGHT: Move the Sun and Moon position in the sky.
CTRL + F: Fly.
CTRL + W: Walk.
CTRL + R: Refresh 3D
Presentation Mode Commands
In full-screen 3D Presentation Mode, press the corresponding letter (no need to press CTRL or ALT) to use the following shortcuts and commands. Most of these shortcuts also have a corresponding button, which can be found by pressing ESC while in Presentation Mode.
ESC: Bring up the menu at the bottom of the screen, where these commands can also be found.
X: Exit Presentation Mode and return to the program.
R: Reset the view to where the Presentation began.
A: Start the automated tour. The view will automatically rotate around the project.
Space Bar: Same as A, starts the Automated Tour.
P: Take a picture/screenshot. These can be found in the screenshots folder.
F: While in Walk mode, enter Fly mode. Fly mode allows you to “fly” anywhere in the 3D View.
W: While in Fly mode, enter Walk mode. Walk mode plants your feet firmly back on the ground so you can walk around.
N: Go from day to dusk to night.
V: Record a video. These can be found in the Videos folder.
+: Add Photo or Video Location.
Enter Key: Play/Pause item and landscaping animations. This command will turn item animations on and off while in Presentation Mode.