3D Measurements help you achieve precise and accurate designs. Share an extra level of detail with your clients and installers, and keep everyone in the project on track.
Automatic 3D Measurements
Many measurements can be taken by simply mouse over the object.
Select the Measure Tool from the panel menu or press the letter C on your keyboard.
Once you decide where you’d like to take a measurement, mouse over the object.
As your move your mouse around, blue lines and points appear in 3D.
Blue Points/Lines: Indicate nearby measurement points.
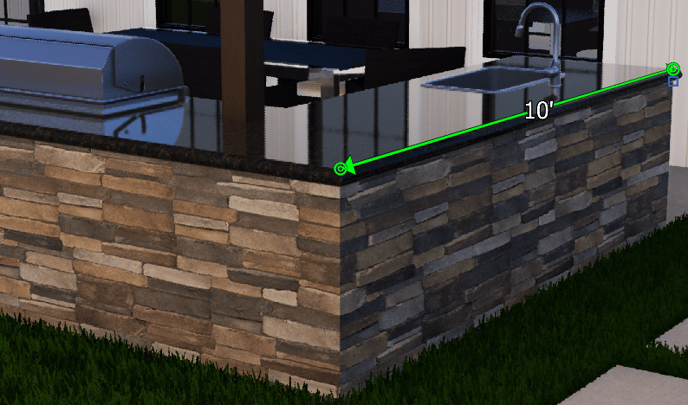
Green Line: Indicates an active line

Mouse over the object until the blue line turns green.
2 ways to add the measurement:
1. Double-click and the measurement will pop out right away.
2. Single left-click, move your mouse until the measurement is in the desired position, then left-click again to place it.
Manual 3D Measurements
Some measurements need to be taken manually. If you draw an object, such as an outdoor kitchen with several pieces, a single green line might not appear. Or if you double-click the green line, the measurement might only cover part of the object.
For example: If you need to measure a kitchen that was drawn in several pieces, begin by clicking on, one section.
Then, left-click once on the green target, and, without clicking the mouse, move it to the end of the section and pan the view as needed.
Find the green target at the end and left-click once for a line to appear.
Like the object gizmo, this line indicates the directions in which you can pull the measurements.
- Blue: Vertical
- Green: Back and forth 90 degrees along the 2D grid on horizontal and vertical planes
- Red: Left and right 90 degrees along the 2D grid on horizontal planes
- White: Left and right non-90 degrees along the 2D grid on vertical planes
- Purple: Back and forth along the non-90 degree angle of the shape on horizontal planes
- Black: Back and forth along the non-90 degree angle of the shape on vertical planes
Once your measurement matches the height of the other measurements, let go of the mouse to set it.
Freeform Measurement Mode
If, when you mouse over the area, you don’t see any section to select, you can choose the Freeform Measurement Mode.
Simply press and hold the CTRL key to have the freedom to start and stop the measurements almost anywhere. You’ll see additional points appear, including midpoints.
While holding the CTRL key, left-click on the midpoint. Once you release the CTRL key, other points will appear where you can connect the measurement.
When measuring in this mode, you’ll see lines.
Like the object gizmo, this line indicates the directions in which you can pull the measurements.
- Blue: Vertical
- Green: Back and forth 90 degrees along the 2D grid on horizontal and vertical planes
- Red: Left and right 90 degrees along the 2D grid on horizontal planes
- White: Left and right non-90 degrees along the 2D grid on vertical planes
- Purple: Back and forth along the non-90 degree angle of the shape on horizontal planes
- Black: Back and forth along the non-90 degree angle of the shape on vertical planes
If you follow the green line towards the camera, you will be able to pull the measurement away. By bringing your mouse back to the 2nd point of the measurement, you’ll be able to switch the direction in which you’re pulling.
To set the measurement, simply left click.
Place 3D Measurements
Once you’ve added 3D measurements to your project, it’s easy to move them to the best location to control the look of your project.
With the Measure tool or the Move tool, you can select exactly where you want your measurements to appear.
Mouse over the measurements until they turn blue. Then left-click, hold, and drag the measurement to adjust its location. When you release the left-click, the measurement will remain where you placed it.
In the panel, you can also adjust the arrow style and the arrow size.
Hide Tape Measurements
Hide the measurements, by using the Tape Measures checkbox under Hide/Unhide.